Sunday, 17 November 2013

November Food News


How to make the perfect apple pie
http://www.theguardian.com/lifeandstyle/wordofmouth/2013/nov/07/how-to-make-perfect-apple-pie
From choosing the pastry, puff or shortcrust, deciding on type of apple, cooking or dessert and how to serve, with cream or custard –  can a plain old apple pie compete with tarte tatin and strudel?


World Restaurant Review
 http://www.telegraph.co.uk/foodanddrink/restaurants/10433150/Venez-avec-moi-monsieur-the-restaurant-where-looks-decide-your-seat.html
"In Paris, rumour has it that the good-lookers get seated at the top tables at Le Georges, while the 'moche' are hidden in the corner"


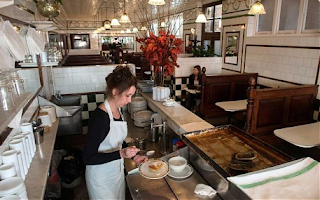
Pie and Mash - London's fast food
http://www.telegraph.co.uk/foodanddrink/10422491/Pie-and-mash-the-fast-food-that-built-London.html
"Taste, allure, a feast for the senses – and that was just the view through the steam clouds rising from a plate of L Manze’s prize pie and mash."


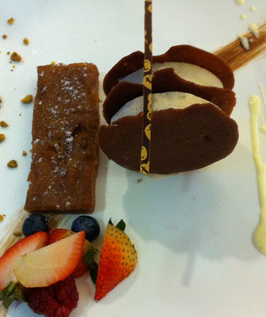
My Life in Food: Cedric Grolet, Pastry Chef
http://www.independent.co.uk/life-style/food-and-drink/features/my-life-in-food-cdric-grolet-pastry-chef-8916504.html
"Grolet is one of the finest pastry chefs in Paris. He took up the wooden spoon at 12, working in the kitchens of his grandparents' hotel in Andrézieux-Bouthéon in the Loire. At 13, he became a kitchen apprentice. By 14, he had specialised in patisserie.

After collecting a clutch of awards – including the National Trophy for Sugar Art – he went to work at Fauchon, training its chefs around the world. Since 2011, he has headed up the pastry kitchens at Le Meurice in Paris, working under Alain Ducasse. He is famed for reinventing classic French desserts."


Monday, 11 November 2013

November Dessert Ideas

With Halloween over and Christmas just around the corner November tends to be the filler month for many while getting ready for the holidays. However the first November frost brings the sweetest parsnips for roasting and baking, while freshly picked chestnuts should be roasted to bring forward their earthy sweetness and then use as required.
Coming into season are satsumas, pomegranates and quinces, while pears and apples are still in abundance. Here are a few ideas using this months harvest!!!
Parsnip Pound Cake

Combine two of this months harvest staples to make this delicious tart,
Pumpkin and Cranberry Tart

Poached Quince with Almonds and Autumn Apple Jelly


 Ginger Cake with Poached Pear
This is a truly winter dessert with all those warm spices, use the poaching syrup from the pears to plump up the dried fruit and to serve this dessert

Pomegranate Meringues

Chestnut Cake with Chestnut Parfait

 Cookie Dough Pizza with Dark Chocolate Mousse, Pomegrante and Toasted Mixed Nuts

 Parsnip Cake with Ginger Frosting

Happy Baking :)

Monday, 21 October 2013

Blackberry and Apple Cobbler

Blackberries are purple, almost black in color often found growing wild in hedge rows, thus they are also called brambles and are in season from July to mid October. Blackberries are delicate to handle, wonderfully intense in flavor and very juicy, they can be eaten raw or can be cooked into a number of desserts. As they are very delicate, avoid washing them but should they require it then do so just before using them.
Blackberries and apples are a marriage made in heaven, the best Autumn combination for any number of desserts such as pies, crumbles, tarts, fools etc. Blackberries also lend themselves to jams, jellies, purees, compotes and syrups.
Here is a simple recipe for a cobbler, which combines the sweet plump juicy blackberries I picked from a hedgerow in a local field (with permission from the land owner!!) and bramley apples from a colleagues garden.
 
Blackberry and Apple Cobbler


700g blackberries 
700g cooking apples (or use dessert apples and reduce the amount of sugar to about 4 tbsp) 
6 tbsp sugar 
5 tbsp plain flour 
1 tbsp melted butter
Topping 

150g plain flour 
2 tsp baking powder 
60g butter 
3 tbsp sugar 
120ml buttermilk (or fresh milk with 1/2 a tbsp lemon juice)

Peel, core and roughly chop the apples and mix with the blackberries, sugar, melted butter and flour. Check the sweetness of the berries as some can be quite tart and therefore you may require more sugar.
Place in a 22x33cm ovenproof dish, I use a cast iron skillet pan for mine which easily serves six people, alternatively you can use individual dishes such as ramekins or oven proof glass jars work really well.
For topping, sift flour and baking powder together. Rub in butter until mixture looks like fine breadcrumbs. Stir in sugar and buttermilk.
Drop spoonfuls of the topping mixture on to the fruit; it doesn't have to be completely covered.
Bake at 190 C / Gas 5 for about 30-40 minutes or until fruit is soft and topping is risen and golden.
Serve topped with whipped cream, vanilla ice cream or with custard.

Fruit cobblers are known by many different names depending on your geography. However the basic principle is the same, fruit filling covered with a biscuit, scone or pie crust batter and either baked or cooked on the stove. 
It is the batter on top that changes from country to country and region to region. In the United States the topping is mainly made with a biscuit batter or cake batter while in the United Kingdom and the European Union the topping is mostly made from a scone like mix. 
For an alternative topping try this
1 cup sugar
1 cup self raising flour
1 cup milk
1 stick of butter(melted)
Put sugar and flour into a bowl and whisk in the milk until well combined. Pour in melted butter and continue whisking to ensure well combined. Pour the batter mix into your cobbler dish, evenly spoon the berries/apple mixture on top making sure you get an even distribution. Bake at 180c/170c fan for about an hour, you can dust the top with more sugar during the last 10 minutes of baking time.
This is a more cake like cobbler topping but tastes delicious none the less and you can serve it with  any of the accompaniments mentioned above.


Happy Baking!!! 

Saturday, 12 October 2013

Too Many Pumpkins!!


Pumpkins are the most famous of all winter squashes and are commonly associated with Halloween. However this king of the vegetable patch is so versatile that the whole pumpkin can be used in the kitchen. Inside the hard outer skin is the sweet orange flesh which has a slight honey flavor to it,  which once combined with a number of spices and herbs is almost divine in taste. The flesh can be used in a variety of ways, whether simply roasted as a vegetable, as a base flavor for pasta, soups, stews, curries, biriyanis, risotto etc or as a base for many desserts and puddings. You can not only use the flesh but also the seeds, which are great roasted and served with salads, in flapjacks, in granola or simply as a snack lightly flavored with spices. The hollowed out outer skin is not only good for making lanterns but can be used as a serving dish for a number of savory dishes.
Most Sweet dishes are made with a pureed pumpkin, you can buy this in cans from select number of supermarkets but making your own is so simple.
Take the pumpkin flesh and cut into cubes of similar size, place the cubes onto a large piece of foil and seal loosely to allow the pumpkin to steam while cooking. Place onto a roasting tray and cook in the oven at 180C/ gas mark 4 for about an hour or until soft. The length of cooking time will depend on the amount of pumpkin you have, 500g will require about an hour cooking time.
Once cooked, drain any excess liquid and pass through a sieve for a smooth puree.


Pumpkin Pie 
A classic American pie, usually served during the fall and early winter season especially around Thanksgiving and Christmas.
500g (1 1/4 lb) pumpkin, cooked and pureed 
1 (410g) tin evaporated milk  
2 eggs, beaten 
175g (6 oz) dark brown soft sugar  
1/2 teaspoon ground cinnamon 
1/2 teaspoon ground ginger  
1/2 teaspoon ground nutmeg 
1/2 teaspoon salt
500g Sweet shortcrust pastry
Roll out the sweet pastry and line a 20cm pie tin and bake blind for 15minutes at 180C/gas mark 4 until cooked and golden
Meanwhile beat the pumpkin with evaporated milk, eggs, sugar, cinnamon, ginger, nutmeg and salt. Mix well. Pour into a prepared pie dish. Bake for 40 minutes at 150C/gas mark 2, it will puff up around the edges but still feel wobbly in the centre. Remove from the oven and cool. Serve either chilled or at room temperature with creme fraiche, whipped cream or just with pouring cream.
Pumpkin Cheesecake
18-20 Ginger Biscuits , finely crushed (about 2 cups) 
1/4 cup finely chopped pecans
1/4 cup butter, melted 
750g Cream Cheese, softened
3/4 cup sugar, divide into 1/2cup and 1/4 cup
1 tsp vanilla extract
3 eggs
1 cup Pureed pumpkin
1 tsp ground cinnamon
1/4 tsp ground nutmeg
Pinch of ground cloves
Heat oven to 180C/ 170Cfan/ 350°F/ gas mark 4
Mix the biscuit crumbs, chopped nuts and butter until well combined,  press the mix into the bottom of prepared 9-inch spring-form cake tin*. Use the back of a dessert spoon to level and really smooth the biscuit crust. Refrigerate to slightly set the biscuit crust 
Beat together the cream cheese, 1/2 cup sugar and vanilla until well blended. Add eggs, one at a time, beating after each until just blended. Remove 1 cup plain batter and keep to one side (you only need to do this if you want a marbled effect cheesecake otherwise just proceed to the next step)
Meanwhile stir remaining sugar, pumpkin puree and all the spices into the remaining batter.
Spoon half the pumpkin batter onto the crust then top with spoonfuls of half the plain batter. Repeat layers and the swirl gently with a skewer or knife
Bake for 45 min. or until centre is almost set**. Cool completely and then refrigerate for at least 4 hours.
  *To make it easier when handling cheesecake, you can line your cake tin with double foil, ensuring it extends over the sides and covers the whole cake tin, then proceed with the above method. Once your cheesecake has cooled you can use the foil handles to lift the cheesecake before cutting.
The shape of your cheesecake depends on your choice of cake tin, I use both square and round for different occasions.   **To check if a cheesecake is done, gently shake the pan. It will be set except for a small area in the centre that will be soft and jiggly. Never insert a knife into the cheesecake as you would with other baked cakes, as this will cause the cheesecake to crack during cooling. 
Here are a few other ideas for using Pumpkins
Pumpkin Risotto - make your basic risotto as per packet instructions with the addition of a pinch of saffron. Meanwhile roast cubed pumpkin with garlic and sage until just cooked. Add to the risotto during the last five minutes of cooking time along with cubed mozzarella, allow to stand for 5minutes. Serve sprinkled with pumpkin seeds.
You will need 500g of pumpkin to 225g of risotto rice and 125g mozzarella
 Beef and Pumpkin Stew -Cook the beef in beef stock until tender, stir in handful of polenta and add diced potatoes and onions and cook for about 15minutes.  Add in chunky cut pieces of carrot, pepper, celery, leeks and pumpkin simmer until the vegetables are tender. Stir in oregano and paprika during the last five minutes, Season and serve sprinkled with coriander. This is meant to be a chunky stew so try to cut your ingredients as such.
Pumpkin Curry - Use the curry paste recipe from my earlier post, with the addition of diced pumpkin and chickpeas you can create a warm hearty vegetable curry, why not serve it in a hollowed out pumpkin shell along with naan bread and rice, garnished with fresh mint leaves

For a different breakfast/brunch experience why not try out these waffles, serve with maple syrup, apple and cranberry compote and creme friache.
Pumpkin Waffles 
3 eggs 
350ml buttermilk 
100ml rapeseed oil 
125g pumpkin puree 
135g wholemeal pastry flour 
2 tablespoons caster sugar 
2 teaspoons baking powder 
3/4 teaspoon bicarbonate of soda 
1 teaspoon ground cinnamon 
1/4 teaspoon ground nutmeg 
1/4 teaspoon ground cloves
Mix the eggs, buttermilk, oil and pumpkin puree in a bowl, beat together to blend well. Combine the pastry flour, sugar, baking powder, bicarbonate of soda and all the spices. Stir the flour mixture into the pumpkin mixture and mix until thoroughly blended together. You should have a pourable batter if not add in an extra tablespoon of buttermilk. Make the waffles as per your waffle maker instructions and keep warm while you continue making the rest.

I hope this page will inspire you to use the pumpkin more for cooking rather than for just making lanterns during Halloween, ENJOY!!


Monday, 7 October 2013

A Date or Two


 Whether fresh or dried, dates are a naturally sweet snack food and eaten as such in many countries. Quite often the dates are pitted (or stoned) and then either glazed with a glucose syrup when dried or stuffed with walnuts, almonds, candied citrus peel and cream cheese. In recent times chocolate covered dates have seen a modern reinvention, as have sparkling date juices, which are used as an alternative to champagne in many Middle Eastern Countries.
Dates can be used in sweet and savory cooking, chopped up in tagines, served in salads with puy lentils or cous cous and why not use pureed dates in your BBQ sauce. For sweet cooking, use dates in cookies, scones, biscotti, cakes or stuffed with a variety of sweet fillings wrap in filo pastry, deep fry and serve with a flavored sugar syrup.

Date loaves are a popular type of cake served at tea times and in the states especially around the holidays.
Date and Walnut Loaf Cake
110g Fresh Dates, stones removed and chopped
55g Butter
225ml Water 
1 teaspoon Bicarbonate of soda 
225g Self raising flour 
55g  Chopped walnuts (or you can use Pecans instead)

170g Dark brown sugar 
1 teaspoon Vanilla extract
1 egg, beaten
Bring to boil the dates and water, adding the butter and sugar, simmer gently on medium heat until the the butter melts and the sugar has dissolved. Stir mixture with a wooden spoon to slightly mash up the dates. Remove from the heat and add the bicarbonate of soda. Allow to cool for about 10 minutes
Combine self raising flour with walnuts and then add to cooled date mixture. Mix well with wooden spoon and add beaten egg and vanilla extract. Spoon mixture into a lined 1lb loaf tin.
Bake in a pre heated oven for 60 to 75 minutes at 170c /fan 150c/gas 3.
Leave to cool before slicing and serve simply with butter.
If serving as dinner dessert then make into individual loaves or as mini cakes and  serve warm with Butterscotch sauce and a scoop of ice cream (my favorite ice cream with this is ginger but vanilla, banana or chocolate work just as well)
These loaf cakes freeze really well, so why not make a batch in advance.
Butterscotch Sauce 
165g dark brown soft sugar 
125g unsalted butter, cubed 
300ml extra-thick double cream
Place all the ingredients in a pan over a medium heat, until the butter melts and the sugar dissolves. Bring to a boil, stirring continuously to prevent sticking and burning, for about 5 minutes or until the sauce thickens slightly. 
Allow to cool slightly before serving


This basic recipe can be adapted to make a variety of cakes/loafs, here are a few ideas to help you along:
Change the flavors and texture by adding a banana or a handful of cherries and lighten the color of the loaf by substituting the dark sugar with light brown.
You can replace the nuts to your personal preference or leave out completely but you may need to add a little extra flour.
You can also substitute white flour with wholemeal or a combination of both for a better fibre content.
Make a ginger frosting and spread over the cooled loaf before slicing, this makes a great tea time treat.
I prefer the addition of a teaspoon of ground ginger to the mix but you can add all spice, ground cinnamon, nutmeg or why not drizzle with honey once baked.
 Fresh Dates

Happy Baking!!!

Friday, 4 October 2013

October Dessert Ideas

Dessert ideas for using seasonal October fruits

Caramelized Apple Tart Tatin

Blackberry Mousse with Mini Pancakes sandwiched with Creme Patisserie

Watermelon Sorbet served with Figs and Peaches

Raspberry and Chocolate Cheesecake Brownies

Apple Doughnuts

Saturday, 28 September 2013

Apricot and Almond Tart


The combination of apricots and almonds with a touch of honey creates a delicate burst of flavors to quench the most discerning of sweet palates.
Macerating fresh apricots with sugar or slow poaching in a sugar syrup will enhance their subtle flavor without overcooking them.
This apricot and almond tart combines all of the above to create a mouth watering treat, whether its for a coffee time snack or as a dessert for a dinner party.

Short Pastry
75g unsalted butter at room temperature
2-3 egg yolks
25g Icing sugar
150g Plain Flour
1-2tbsp water, optional
Rub together the flour, sugar and butter until the mix resembles fine breadcrumbs.
Add the egg yolks and mix with enough water to make a smooth soft pastry.
Wrap in clingfilm and chill for about 30 minutes to firm the dough.
Roll dough out thinly to line the base and sides of your tart tin ( this mix is enough for a deep 8inch tart tin) If you find that your pastry tears easily you can patch it with your fingertips. Prick the base slightly with a fork, line with parchment paper and weigh down with baking beans and bake blind at 170c/150c fan/ gas 3 for 25 minutes. Remove the parchment and beans, bake for a further 10 minutes until crisp. Remove from oven and leave to cool. At this stage the base will store chilled for 3days.

Fruit filling
8-10 Fresh apricots, halved and de-stoned
Handful of sugar, adjust depending on the sweetness of the apricots
2tbsp honey (for a more enhanced flavor you could use brandy or Grand Marnier)
Place apricots in a bowl and toss with the sugar. Drizzle with the honey or alcohol and leave for at least an hour to infuse the flavors and soften the apricots. I find its best to do this the night before to get maximum macerating time.
Drain the apricots and leave to dry for a while, making sure to reserve the liquid for use later.

 Frangipane filling
115g Butter, softened
115g Honey
100g Ground almonds
2 eggs
1/4 cup Double Cream
Whisk together the butter, honey and ground almonds until smooth.
Add the cream but stir it in rather than whisking so as not to emulsify, this will make it rise during baking ( if you do want a slight rise during baking then whisk slowly for a few seconds)
OR
You can make the frangipane filling from my earlier post The Bakewell Tart Experience, which is a more cake like frangipane.

Either frangipane filling works just as well however I find that the creamy filling creates a better tart for cold/warm dinner dessert while the cake frangipane makes a better hot dessert especially if served with custard or a coffee time snack

To assemble the tart, arrange the apricot halves on the base of the tart crust and pour the creamy mixture over the top. Bake at 180c/170c fan for about 25 - 30 minutes or until lightly golden brown. Longer baking time is required for the cake frangipane, check by using the skewer test during cooking
Cake Frangipane Tart

You can also make individual tarts rather than one whole tart, this recipe will give 8-10 good sized tarts. For parties etc you can make them smaller and get about 20-24 mini tarts. For these you will need to cut the fruit smaller, I tend to quarter the apricots and then slice each quarter into half again or slice thinly and arrange on top of the frangipane. Making sure to push the slices down into the frangipane slightly.
Individual Tarts

You can use this recipe with other fruits such as peaches, nectarines, plums and any other stone fruit that is in season.
This is a great recipe for a dinner dessert as it can be prepared well in advance before being assembled and baked on the day/evening.
Serve warm simply with the reserved macerating liquid, ice cream, creme fraiche or custard.

Enjoy!!!

Friday, 20 September 2013

Fig Newtons or Fig Rolls?

 Fig Newtons
Called Fig Newtons in the U.S.A and Fig Rolls in the U.K, these are a cross between a cake and a cookie, made with an almost soft cake like pastry and filled with a moist fig filling.


Fig rolls are made from a short pastry which is filled with a fig paste, originating from Egypt where they are still a very popular treat. While in Europe and the rest of the world the pastries are known as Fig Rolls and are produced by the Britannia companies in India.
However the American Fig Newton was introduced by Charles Roser, during the development of industrial production, to the Kennedy Biscuit Company. He called them Newtons after the local town of Newton, Massachusetts. The Kennedy Biscuit Company later merged with the New York Biscuit Company to form Nabisco, who trade marked the product as Fig Newtons*

Fig Newtons are made from a pastry which is more cake like while being soft and chewy in texture. While the Fig Rolls are made from a short pastry dough and are more crumbly.

Here are recipes for both for you to try and see which you prefer
Fig Newtons
200g S/R Flour
100g Butter
75g sugar
25g honey
1/4 tsp Baking powder
1/4tsp salt
2tsp Vanilla Extract
large pinch of ground cinnamon
1tsp Orange zest
3 Egg yolks
2-3 tbsp of orange juice

Filling
300g dried figs
50g apple sauce
3-4tbsp honey
1/4 tsp cinnamon

For Fresh Fig Filling
2 - 3lbs Fresh Figs (depending on how much filling you use), Quartered
4tbsp Honey
1/4tsp cinnamon
1/4cup water
Boil all the ingredients on a low/medium heat until you get a semi dry mix, blend to get a smooth paste and then bring back to the heat to remove any excess liquid making sure not to over cook the figs

Sift the flour and salt, set aside
Cream the butter and sugar along with the honey, baking soda, vanilla, cinnamon and orange zest, until pale and fluffy
While continuously whisking gradually add in the egg yolks, mixing well after each addition.
Add all the flour and the orange juice (start with 2tbsp) and mix until well combine, the dough will be soft and wet (if not then add in the extra tbsp of orange juice).
Cover your worktop with clingfilm/plastic wrap (enough to wrap the pastry mix)
Scrape your pastry into the middle of the clingfilm, wrap once and flatten then wrap with remaining clingfilm and refrigerate for a minimum of 5 hours or overnight
The pastry will still be soft but more manageable.
For the filling
Place all the ingredients into a blender/processor and pulse until all the mix is smooth (the mixture will be paste like. Put mix into a piping bag with a plain basket weave tip or corner snip the piping bag
To roll the pastry, dust the rolling surface heavily with flour to prevent sticking and dust the dough.
Dust frequently while rolling and turning pastry. Roll pastry to 1/4inch thickness rectangular strip.
Cut into 3.5inch x 7inch strips, this size fits my baking sheet but you can roll the length of your strip to fit your baking sheet (this will making handling easier later on).
Remove any excess flour from pastry. Pipe filling into the middle of each strip, my filling is about 1inch in width and 1/4inch thick.
I find this ratio works well but you can make it thinner or thicker.
Roll the one long end of pastry over the filling and then roll the folded end over the flap of pastry. The dough will be doubled where the two strips overlap at the bottom, this will give you the classic bowed newtons shape.
Dust off any excess flour from the cookies, place onto prepared baking sheets and bake for 12-14 minutes until the cookies have puffed up, lightly browned and are firm to the touch. Continue to cook for a few more minutes if the cookies are moist or not puffed up.
Remove cookie strips from oven and straight away trim each strip into 5 even sized (about 1-1.5inch) long cookies.
While the cookies are still warm, place in a air tight container or zip-loc bag and seal tightly. If you stack them then place a sheet of parchment between each stack. Sealing the cookies while still warm will slightly steam them. This gives them the soft cake like texture while skipping this step will make your cookies more drier.
Store at room temperature for about 2 weeks, though they will not last this long!!!

To make Fig Slices
Split your pastry dough into two equal amounts, Place one piece of the pastry in the freezer for about 2hours or longer so that you can grate it easily.
Use a 8inch x 6icnh x 1inch baking tray, grease and dust heavily with flour.
Take the remaining piece of pastry and flatten into the tray using your hands, making sure it is evenly flattened. The pastry should come up to about 1/3 of the way up, place the tray in the fridge for as long as your frozen pastry is in the freezer.
Spread the fig mixture evenly over the pastry 
Then grate the frozen pastry over the fig mixture and make sure to spread it out evenly.
Bake for about 15 - 20 minutes, should slightly puff up and be lightly golden brown. if still moist in the middle then bake for a bit longer
While still hot cut in half lengthwise and then cut into slices, I get 24 slices in total.
 Fresh Fig Rolls

Fig Rolls
125g Plain flour
125g Plain Wholemeal Flour
150g Lightly Salted Butter, softened
75g Light Brown Caster Sugar
2 Egg yolk
1tsp Vanilla extract

Rub the sifted flours (along with the bran) with the butter until the mixture resembles breadcrumbs
Mix in the sugar, vanilla extract and the egg yolks to make a firm dough (you may require some water or an extra egg yolk to bring the dough together). Wrap in clingfilm/plastic wrap and chill for 30 minutes.
Roll out the dough to 1/4inch thickness rectangular shape and then cut into 3.5inch x7inch strips on well dusted worktop to prevent the pastry sticking.
Pipe the fig paste into the middle of each strip and fold one end over the filling, then fold the folded end over again so that the overlap is at the bottom. Dust of any excess flour and flatten each strip slightly and then prick with a fork or score with a knife
Cut each strip into 1inch biscuits, you should get around 20, place biscuits on a greased baking sheet.
Bake for 12 - 15 minutes in a preheated oven at 190c/gas 5 until lightly browned
For the Filling, use the same quantity as for the Newton recipe.

Fig Rolls
Use other fruits to vary the fillings and add ground nuts to give you a variety in tastes and textures. You can also use this recipe to make fig slices, by dividing the dough into two and roll each piece to fit your baking pan. Place one piece of rolled out dough into the prepared baking pan and prick with a fork before topping with your filling. Cover with the second piece of rolled dough and then bake in a preheated oven for about 15-20minutes or until lightly browned. Check to make sure the bake is cooked all the way through, you may need a longer cooking time. Remove from the oven and allow to cool slightly before cutting into slices.

So which is your favorite and why?


*source material is from Wikipedia

Saturday, 14 September 2013

Todays Bake-Seriuosly Chocolately Pear Brownies


Chocolate and Pear Brownies

These squidgy and moist Brownies are for the chocoholics amongst us but with the addition of pear, they count as one of your five a day!!!

350g Dark Chocolate (70%)
250g Unsalted Butter
3 whole Eggs
250g Caster Sugar(use soft brown sugar for a more nuttier taste)
55g Plain Flour
55g Cocoa Powder
1tsp Baking Powder
2 Ripe Pears, peeled, cored and diced

Pre-heat oven at 180c
Grease and line with parchment a 30cm x 20cm x 4cm baking pan

Melt the butter and chocolate in a bowl over a pan of simmering water (or you can do this in the microwave but make sure not to burn the chocolate).
Meanwhile whisk the sugar and eggs until pale and fluffy then while still whisking pour in the chocolate and butter mix, whisk until well combined
Sift together the flour, cocoa and baking powder then fold into the chocolate mixture.
Add the diced pears to the mix and stir in (Optional - you can add in a handful of chopped nuts of your choice at this stage, they will add another texture)
Pour the mix into your baking pan and level to get an even bake.
Bake for 30-40 minutes, I prefer my brownies to be just soft in the middle so I tend to bake them for about 35minutes. However if you want yours slightly gooey then bake for 30minutes but if like them more cakey then go for the full 40minutes.
Leave to cool before cutting and removing from the pan, you should get 20 squares.
When serving these as a dinner dessert, with ice cream and caramel sauce, I will serve them warm.
If serving as a tea time treat, serve cold with whipped vanilla cream or dredge with icing sugar and cut each square into 2 triangles to serve with coffee.
Instead of using regular pears why not try using Nashi (apple) pears or if your not keen on pears then omit the pears and use mashed bananas.


Good baking and happy eating!!

Friday, 13 September 2013

Autumn Dessert Ideas

Honey Roasted Figs with Vanilla Mascapone and Crushed Toasted Pistachios

Marbled Pumpkin Cheesecake

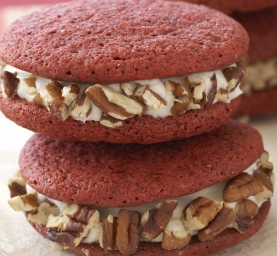
Red Velvet Whoopee Pies with Crushed Pecans

Mini Apple Fritters Dusted with Cinnamon Sugar

S'mores Cupcakes

Friday, 6 September 2013

Comfort eating on a raining day

With the change of seasons comes the unpredicted weather, one day the sun is shining and the next its pouring down with rain.  But there are those days in between when the drizzle of rain carries on all day and the coldness goes through you.
On these days I want to eat something warm, robust and satisfying for breakfast, lunch and dinner. I don't want to spend all day in the kitchen but neither do I want to have something too light and subtle. Earlier in the week I had made a batch of bread dough, from which I had made Pesto, Rocket and Feta pizza.
With just under a third of the dough leftover( not enough to make a loaf but enough for a couple of rolls). I split the dough into two and then rolled each ball into a oval shaped flat bread, brushed with garlic and herb infused olive oil and baked in the oven for about 8mins in a moderate oven.
I used store cupboard ingredients to make this simple Asian chickpea soup. I made enough for one largish bowl, but you can make larger quantities using this recipe just by upping the ingredients. This is a really good homely comfort eat for me as it always reminds me of my family home.

Channa Masala Soup
1 small onion finely chopped
half a can of cooked chickpeas
half cup of curry sauce (made from previous post) You can use a shop bought curry paste
1tsp garam masala
1 small tomato roughly chopped
2tbsp of low fat yogurt
fresh coriander chopped

Fry the onions in a tsp of oil until soft and transparent, add the curry sauce and warm through. Add the chickpeas with some of the canning liquid and cook by simmer for about 10-15 minutes, you can also season with salt and pepper at this stage if you like. Turn off the heat, but leave on the stove, sprinkle on the garam masala and cover for 2mins.
Serve in a large bowl sprinkled with the coriander,
The tomato and yogurt you can either serve on top or separately on the side.
I had mine with the garlic and herb flat breads but you can serve this with rice or shop bought naan bread.
You can also add a handful of spinach if you have some and if you don't have chickpeas then you can use any canned bean/pulse you have in your cupboard/pantry
This dish should take no more than 25-30mins to make from start to finish, quicker and healthier than any takeaway curry
This recipe is so adaptable to make any type of bean soup using whatever you have to hand.
It is important to add a depth of flavor to canned beans as they tend to be bland on their own. I also use the canning liquid as it contains a lot of nutrients and flavor from the beans.
You can omit the curry sauce with a tomato sauce base, cannellini (white) beans,  adding fresh basil and oregano.
By swapping the cannellini beans with black beans and adding minced chilli, garlic and cumin. Add diced pepper to the onions, you will have a spicy black bean soup. Serve with either sour cream or guacamole for a bit of extra decadence and tacos
 Spicy Black Bean Soup
Add cooked rice during the last 8-10 minutes to make it more like a one bowl chilli ( for a meaty version add diced beef to the onions and saute)
You can use chicken/vegetable stock instead of the sauce, add a couple of minced garlic cloves, oregano , pancetta/crispy bacon and a handful of cooked pasta
Add crumbled Italian sausage or for a Spanish flavor add chorizo
You can also add in the rind of parmigiano-Regina cheese which will give the soup another layer of flavor.
You can also add cooked meats to create a bean stew, I will often use roast meat bones or bits of meat leftover from the previous evening to create a stew in under 30 minutes. Saute the meat/bones with the onions and add any leftover vegetables (chop into a small dice), pour in the beans with the liquid. Add your choice of herbs and stock, leave to simmer for about 20-30 minutes, remove the bones, season and serve.
I hope that these few ideas will encourage you to use more canned beans/pulses to make everyday meals with a minimum of effort and inspire you to create your own combo.
 Chicken, bean and vegetable stew


Joyous dining!!


Wednesday, 4 September 2013

A Marrow day

The other day I was given a marrow by a neighbor. For those of you who don't know what a marrow is, it's basically a large courgette and a member of the squash family . Its subtle in flavor and quite tender, can be slightly watery, so always a good idea to remove the excess water. The skin can be tough and bitter on some varieties.
To prepare the marrow for cooking, top, tail and peel. Scoop out the middle, making sure to remove all the seeds and cut into rings for frying or into chunks/cubes. Sprinkle with salt and leave in a colander for about an hour to remove the excess water.

 
Usually I would stuff it with a savory mince beef mix, top with cheese and then roast, or just simply roast with garlic, olive oil and seasoning, great with grilled fish or chicken. However when having it with roast meat, it's best to put the marrow in the meat roasting tray and let it soak up the meat juices. Do this during the last 25-30 minutes of the cooking time. On my Pickling and Preserving page I mentioned that marrow can be used in Piccalilli. Now as my marrow was quite large, I used about third for the piccalilli, this gave me enough to do two large jars of piccalilli.
With the remaining marrow, I decided to do something a little different then the usual. So after hitting the recipe books for a few hours this is what I came up with.
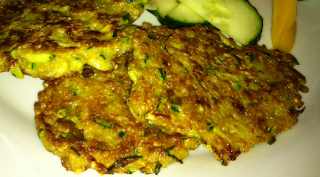
Marrow fritters (this is adapted from a codfish fritter recipe)
This recipe will gives you about 20-24 fritters
400g Grated marrow and 1tsp of coarse salt- combine and leave in a sieve for 30minutes to remove excess water
2 Onions, finely chopped
2 Tomatoes, de-seed and finely chopped
2 cloves Garlic, finely chopped
2 Scallions, finely chopped
1/2 Scotch Bonnet pepper or 2 med size chillies, de-seed and finely chop (adjust to your taste)
Freshly ground black pepper and salt to taste
400g self-raising flour
2tsp baking powder
Oil for frying
Saute the tomatoes, onion, garlic, scallions and scotch bonnet/chillies in about 2tbsp of oil. Once softened, drain and cool.
Drain the marrow and combine with the sauteed vegetable mix, add salt and pepper.
Mix the flour and baking powder, then add to the marrow mix. Add enough water to make a medium batter or use egg and milk to make the batter.
I left the batter for about 30 minutes before frying. I used a tablespoon of batter for one fritter, this made frying in batches easier and gave a more regular size. Keep warm in the oven until you have cooked all the batter.
My first batch was a bit of disaster as the fritters were not cooked in the middle, this was due to my oil being too hot!! Once I got this under control the fritters came out crisp and golden. Next time I think I will saute the grated marrow with the other vegetables. 
I also made a few fritters using a teaspoon, the right bite size for snacks ( great for future game night snack)
For lunch I used the fritters as a filling for my tortilla wraps, 3 fritters per wrap, with lettuce, tomato and sour cream.
For dinner I served the fritters with avocado, tomato, red onion and cucumber salad. My favorite dipping/dressing sauce to serve with any type of spicy fried fritters is yogurt, lemon juice, chopped garlic and mint leaves.

I still had quite a bit of marrow left, which I peeled, de-seeded and then cut in half. With one half I chopped into large 1inch chunks, the other half I sliced into long 1/4inch thick slices, salt and leave to drain for at least an hour or longer if you can.
The diced marrow I used to make ratatouille by substituting the courgette.
I don't have a recipe that I stick to but here is a list of ingredients that I used
Tomatoes - quartered
Aubergines - 1inch chunks
Marrow - 1inch chunks
Onion - quartered and the half each quarter
Peppers(if available) - 1inch chunks
Olive Oil
Fresh Basil Leaves - ripped rather than chopped
Fresh Garlic - crushed
Freshly ground black pepper
Place all the ingredients into a large roasting pan except the basil and make sure to mix well. Roast in a medium hot oven for about 25-35 minutes until the vegetables are tender and slightly browned.
Sprinkle with basil leaves and serve with your choice of meat or fish.
As I froze my ratatouille mix, I did not cook it and left out the basil leaves. You can freeze after cooking as well, just make sure to cool it properly before hand.
This ratatouille mix can be used in pasta sauces, as a vegetable base for cous cous, quinoa, puy lentils and pasta for salads, just omit the basil for other fresh herbs of your choice.
I think that this vegetable base will also work well for a quick vegetable curry.

With the sliced marrow, I made a vegetable lasagne using home-made tomato, pumpkin and spinach sauce with layers of marrow (instead of lasagne sheets) and topped with a bechamel sauce . You can make a meaty version using a classic beef bolognaise sauce. Again I made this for the freezing, therefore I did not top with cheese as I like to do this when ready for cooking.
Both dishes should keep in the refrigerator for about 3 months, once defrosted should take about 30-40 minutes to cook.

If any of you have any other favorite marrow recipes, please feel free to share them with me.

Enjoy!!


Saturday, 31 August 2013

The Bakewell Tart Experience

A very classic British dessert and a favourite of mine, although it has fallen out of favour due to the sickly sweet or bland tarts commercially mass produced by the large bakeries/supermarkets.
The original tart comes from the Derbyshire town of Bakewell, hence the name, although the recipe and what constitutes as the perfect bakewell tart have lead to many a discussion into the early hours of the morning!!
Bakewell Tart is made using short pastry with a layer of jam, covered with a ground almond sponge (known as a frangipane) and topped with flaked almonds
Bakewell Pudding is made using flaky pastry with a layer of jam covered with a egg and almond filling.
Cherry Bakewell is a tart covered with a layer of fondant icing and topped with a cherry
Bakewell Tart
Bakewell Pudding
My preference is towards the classic and simple tart, served warm with homemade custard. This is the recipe I use,
Pastry
I make a sugar pastry which has a slightly higher fat content but you get a sweeter flavor and softer texture.
8oz Plain/all purpose Flour
5oz Unsalted soft Butter
2oz Caster sugar
1 Egg
Pinch of Salt
Pre-heat your oven at 190c (170c fan)/gas 5

Sift the flour and salt together in a bowl. Rub in the butter til you get a breadcrumb like mixture, mix in the sugar. Add in the whisked egg and bring together to make a smooth soft dough. Wrap in clingfilm and refrigerate for about 30 minutes.
You can roll out the pastry but being a soft pastry it tends to tear and crack easily, therefore I pat it into to a greased and floured tart/flan pan using my hands. Once you have a even layer along the bottom and sides, prick the bottom with a fork and blind bake for about 15 minutes. Leave to cool for a minute or two then remove the paper and beans and return to the oven for a about 5 minutes til the pastry is golden brown.

Meanwhile make your frangipane
4oz Butter
4oz Caster sugar
2 Eggs
4oz Ground almonds
1/2oz Flour
1/2tsp baking powder
Zest of 1/2 a lemon
Cream together butter and sugar, gradually adding the eggs while continuously whisking. Add the lemon zest and then fold in the ground almonds along with the sifted flour and baking powder.

For the fruit filling I prefer to use seasonal fruit compote, although raspberry jam is considered to be the classic filling. I would urge you to experiment with your favorite fruits but store cupboard jam is an acceptable alternative.
At the moment cherries and raspberries are in season so I will be using raspberry compote.
8oz Raspberries
1-2oz Caster sugar
Juice of 1/2 lemon
Put all the ingredients into a pan and bring to the boil, leave to simmer for about 10-15 minutes til thickened. Allow to cool slightly.

Pour the compote into the pastry case spread over the base, top with the frangipane and level to get an even bake.
Place in the oven and bake for about 25 minutes until well risen and golden brown. You can add flaked almonds during the last 5 minutes of the cooking time.
Remove from the oven and allow to cool slightly before removing from the tart pan. Place on a serving plate and dust with icing sugar (optional)

I like mine with custard but you can serve with pouring cream, vanilla flavored ice cream, creme fraiche or serve cold with your choice of beverage.

Happy Baking

Thursday, 29 August 2013

Pickling and Preserving Vegetables


With September around the corner, it is a good time to start thinking about preserving foods for the winter months and getting ahead in your preparations. The most common way of preserving these days is to freeze, which is a great way of having summer vegetables during the cold winter months. The easiest way to freeze vegetables is to prepare them by peeling, slicing,dicing or simply chopping and then blanching in boiling water for a few minutes, this helps maintain the taste, texture and flavor. Then refresh straight away in ice cold water, this will help keep the color, drain well and pat dry. You can either freeze in single layers on baking sheets then bag and store or you can simply bag and store. Make sure you label the bags and date them before putting in the freezer as this enables you to have a  good stock rotation.
The following vegetables are available cheaply and in large quantities at farmers markets,
Beetroots
Cabbage
Pumpkin
Sweetcorn
Globe artichoke
Celery
Leeks
Runner Beans
Marrow
The following are going out of season in the next month or so but you may still be able to pick some up economically
Courgettes
Tomatoes

One of the best and truly English ways to preserve summer vegetables is to make Piccalilli, its fairly easy to make and is great with raised pies, boiled meats and strong cheeses.
This recipe will make about 6/8 jars
1lb small pickling onions, peeled
1lb cauliflower, small florets
1lb runner beans, trimmed and finely sliced
1lb courgette or marrow, 1/2inch dice
1lb cucumber, de seeded and 1/2inch dice
1lb pumpkin, peeled, de seeded and 1/2inch dice
1lb salt
2tsp (30g) mustard
2tsp ground ginger
2tsp curry powder
1tsp  turmeric
2tsp black peppercorns
1lt malt vinegar
2tsp cornflour
Place the vegetables with the salt in a large bowl, cover and leave overnight.
Drain and rinse vegetables under cold water and dry ( I place the vegetables on clean tea towels)
Put 3/4 of the vinegar in a large non-metallic pan with the spices and the vegetables. Bring to the boil and simmer until the vegetables are just tender.
Mix the cornstarch with the remaining vinegar and add to the pan. Mix and simmer for about 5mins, the mix should thicken up.
Put into hot sterilized jars, seal with airtight lids and cool.
Leave for about 3 months in a cool, dark cupboard.
Here's a general guide to getting you started on pickling vegetables
Any vegetable you can eat raw are easy to pickle
Any that usually have to be cooked like cauliflower, beetroot, carrots etc you will need to cook before hand to make tender ( I like mine to still have a slight crunch) so cook your vegetables according to your taste.
Pickling spices are also a personal preference and you can buy pickling spices from the store for a variety of pickles. However I like to add my own as the combination possibilities are endless but here is a few I pick from mustard seeds, peppercorns, bay leaves, dill seeds,fennel seeds, cloves, star anise, cinnamon sticks, juniper berries, coriander seeds, cumin seeds and chilli flakes. As well as fresh garlic, whole chillies, ginger, lemon grass and tamarind.
For the pickling liquid use 2 cups of white wine vinegar, 4tbsp sugar, 2tbsp salt and 1 cup of water. Bring the first 3 ingredients to a boil and then simmer til the sugar and salt have dissolved. Then add the water which will reduce the temperature and pour over your vegetables.
You are now ready to can the vegetables ensuring the liquid submerges the vegetables in the jar. You can store in the refrigerator for about a month but the vegetables are normally ready to eat within a couple of hours.
To store for longer you will need to omit the water from the pickling liquid and the storage jars will need to be sealed with airtight and vinegar resistant lids. Store for a few weeks before using but give the jars a shake once a week to infuse the flavors.

My favorite pickling combinations are:
Pickled Slaw- carrot, white/green cabbage, bell peppers, white onion, sugar snap peas, cucumber, celery or you can go with any combination of crunchy vegetables you have. Juilenne (thin strips) the vegetables, add mustard seeds and thin strips of fresh chillies,  cover with the pickling liquid, and store in the refrigerator. Leave overnight before eating and it can be stored in the refrigerator for about a month (dare anyone to still have the first batch after the first month!!). This is great as a salad, on sandwiches and as an accompaniment to burgers, hotdogs and cold meats


Giardiniera(Italian pickle)- aubergines, courgettes, red onion, fennel, bell peppers and cherry tomatoes (you can also use carrots, celery, cauliflower, olives) they should be roughly diced/small florets. For the spice flavors use fresh garlic, chilli flakes, celery seeds, oregano, bay leaves and peppercorns. You will need to soak the prepared vegetables in a brine (water and salt) overnight and then drain well before pickling. You can also add a couple tbsp of olive oil if you wish to your pickling liquid. Put into sterilized jars with airtight lids and store for a month before eating. Will keep for about 6 months. Use as an accompaniment with any Italian dish or with grilled fish and meats.

Achar(Indian pickle)-Indian pickles are made using mustard oil instead of vinegar, for the spice mix use the following 1cup of mustard powder, 3/4cup of salt, 1tsp fenugreek powder, 1tbsp dried mango(amchar) powder, 1tbsp fennel seeds coarsely ground, 1tsp turmeric, 3/4tbsp nigella seeds and 1/4lt of mustard oil. Mix all the ingredients to form a paste and then add to about 4cups of your chosen prepared vegetables( I leave my vegetables to dry on clean tea towels overnight). I also add 2 green chillies, cut into small pieces, 8 cloves of garlic left whole and 1inch piece of ginger cut into strips. Add 1-2 tbsp of vinegar, mix well and put into a large sterilized container . Making sure you use any remaining mix to top up the jar . Cover the jar with a lid and keep aside for 3 days, once a day stir the vegetable mix with a clean spoon/ladle. On day three you will notice that the oil is floating on top of the vegetables if not than top up with more oil, check seasoning and correct if required. Decant into sterilized airtight jars and store for at least a week before using to allow the flavors to infuse. I find the longer its left the more intense the flavors. It will keep for a good 12 months in airtight jars.
You can also use this method to make singular vegetable pickles i.e green mango, lime, carrot, cauliflower etc.

I hope this inspires you to make your own combination of pickles and please let me know how they turn out. If you use the above recipes, please give me your feedback as its always great to know what you think of the recipes.

Next time I will be looking at preserving fruits for the winter months.

Happy Pickling and Preserving